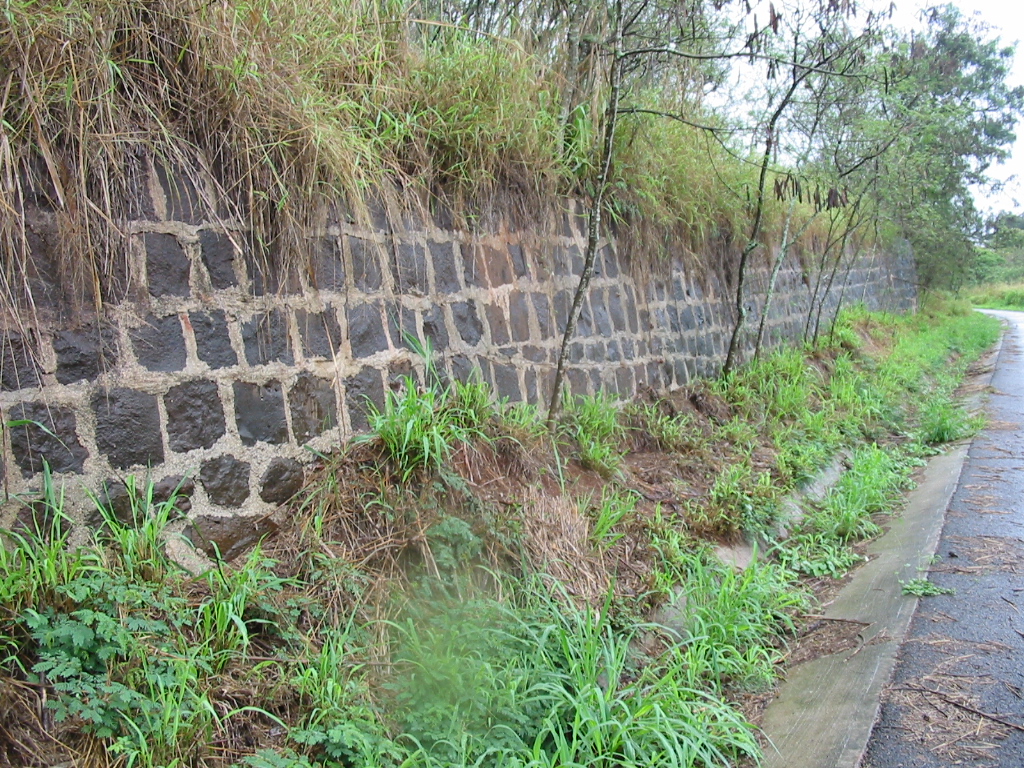
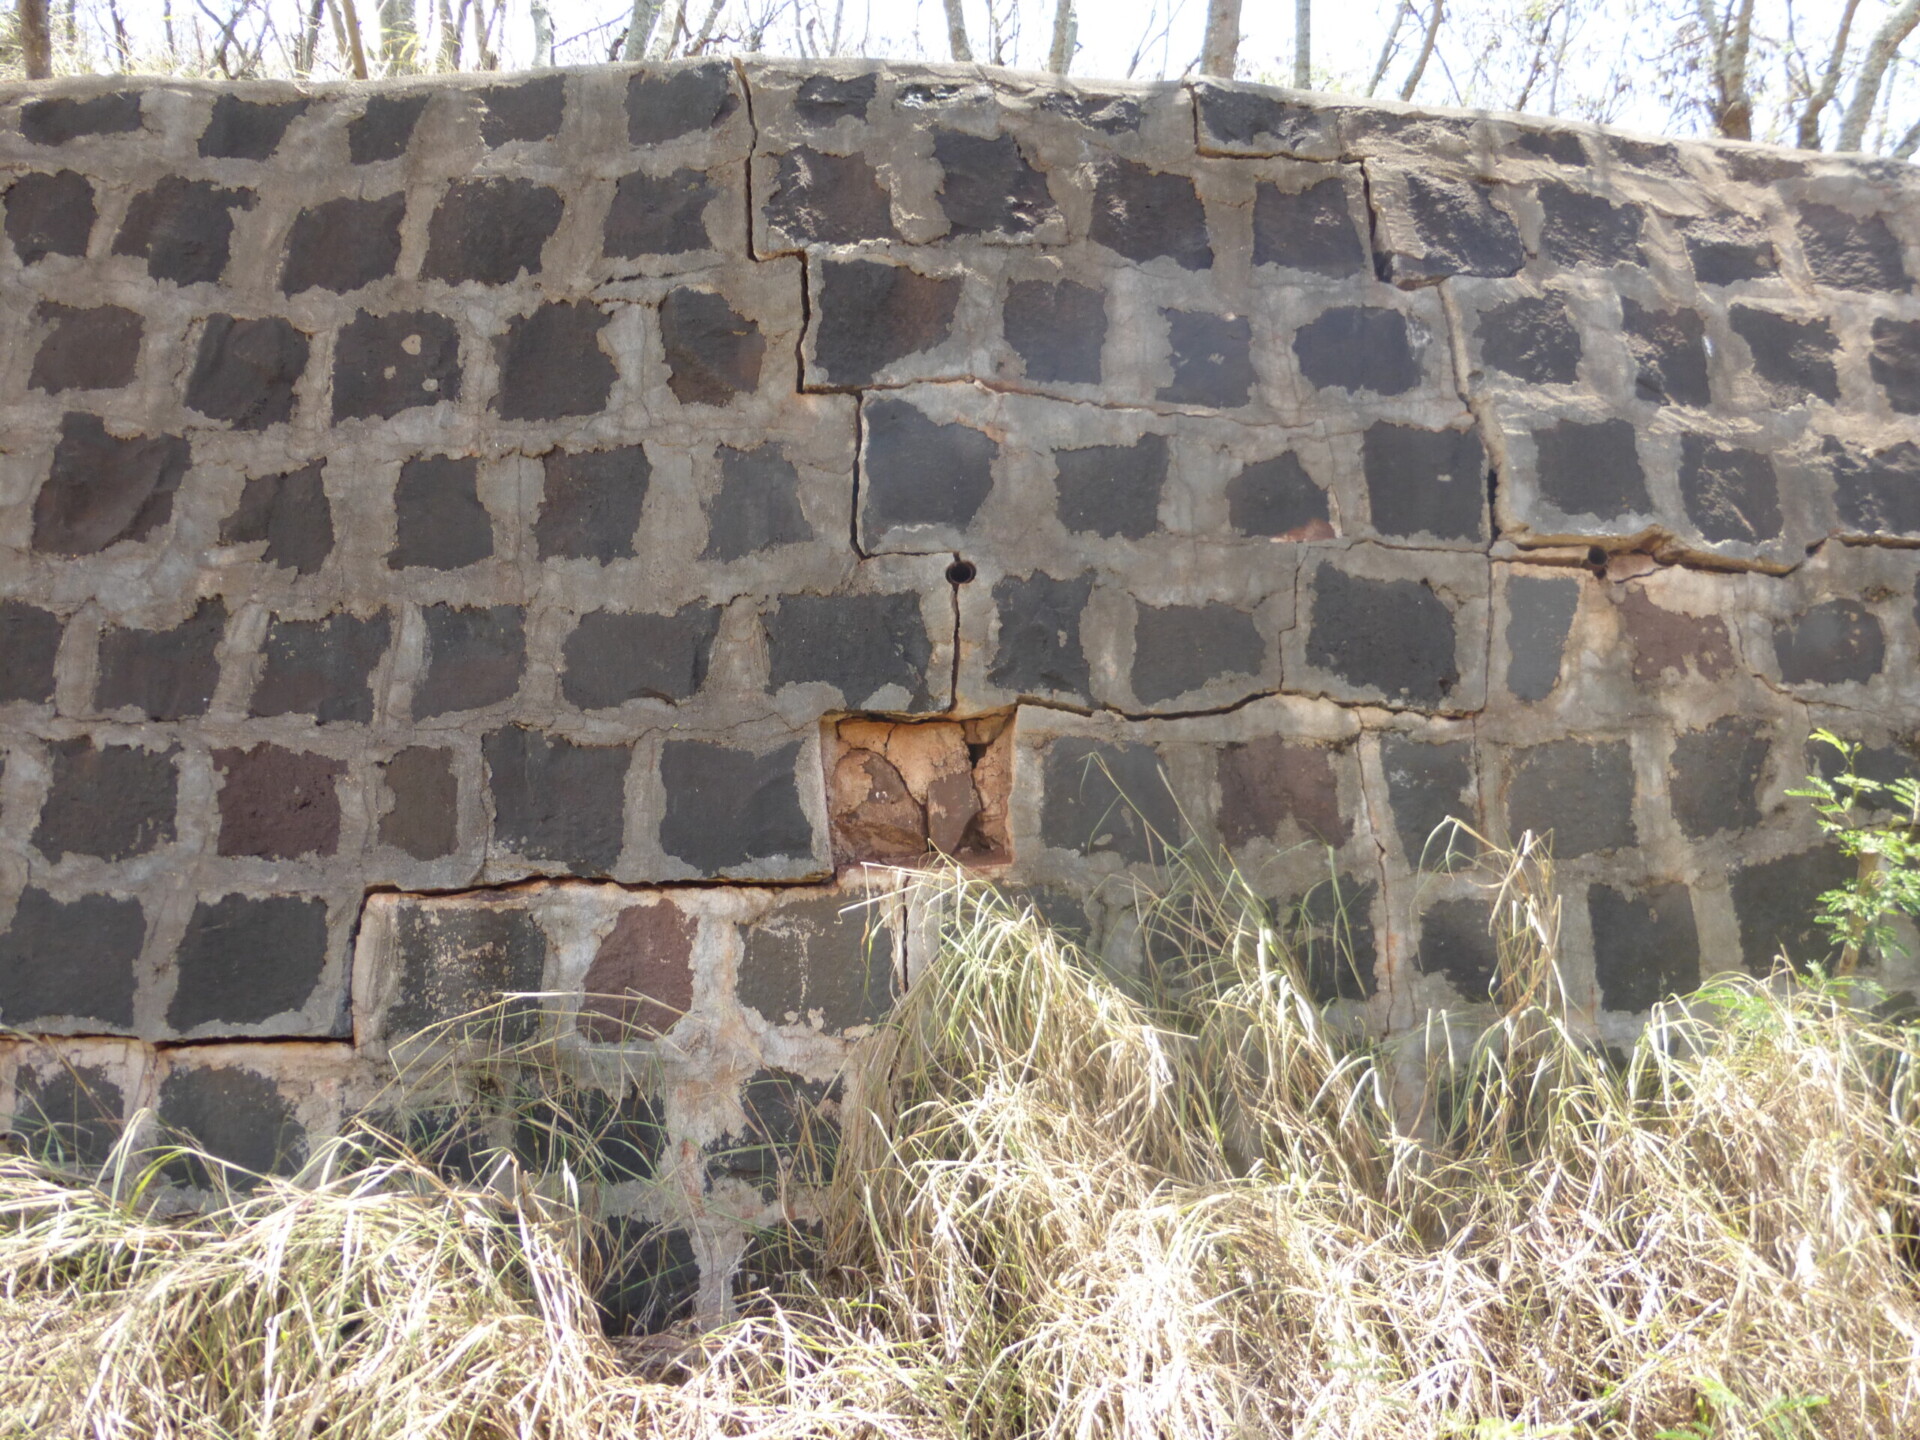
As a responsible preservationist, you are about to undertake a repair project on a historic structure. Up to this point, you have surveyed the property, identified character-defining features (those features that contribute to the historic significance of the property), evaluated the condition of those features, and determined that repair is necessary.
You are now ready to plan for the appropriate treatment method to preserve the integrity of the historic property.
Following the Secretary of the Interior’s (SOI) Standards number 5 and 6 for Rehabilitation:
- Distinctive features, finishes, and construction techniques or examples of craftsmanship that characterize a property shall be preserved.
- Deteriorated historic features shall be repaired rather than replaced.
A critical step in preparation for physical repair is to document the location and configuration of the historic feature. Examples of the type and importance of documentation are presented below.
EXAMPLES OF DOCUMENTATION
I. Rehabilitation of a Retaining Wall: The Mortared Stone Retaining Wall at Honouliuli National Historic Site
In order to stabilize the historic stone wall (shown in images at top), portions must be removed to allow access to the unstable earth and fill behind. Upon stabilization of the supporting fill, the stone wall will be reconstructed to exactly match the original configuration.
Notes by the architect include:
- Image 1, Site map of the location and access.
- Image 2, Topographic survey pinpoints the area of repair work.
- Image 3, Numbered stone diagram recommends how to organize the removal of stones. “Remove all numbered stones per the drawings. Each face stone shall be numbered on one side or back, with a non-water-soluble marker, in a manner that will also indicate the orientation of the stone (e.g. which edge is the top edge). Store removed face stones in a logical, numerically sequential manner, on site.”
- Image 4, Diagram of the wall section: “The mortar for the outer one-inch of the mortar joint shall match the existing mortar of the wall to remain. Mortar joint dimensions, texture and finish to match original on either side of the portion of wall to be replaced. Any differences in color shall be resolved through employment of a joint color modifier. Upon completion of the project, there shall be no discernable difference between existing mortar and new mortar. Assume that all joints shall be stained or tinted to match adjacent existing mortar color.”
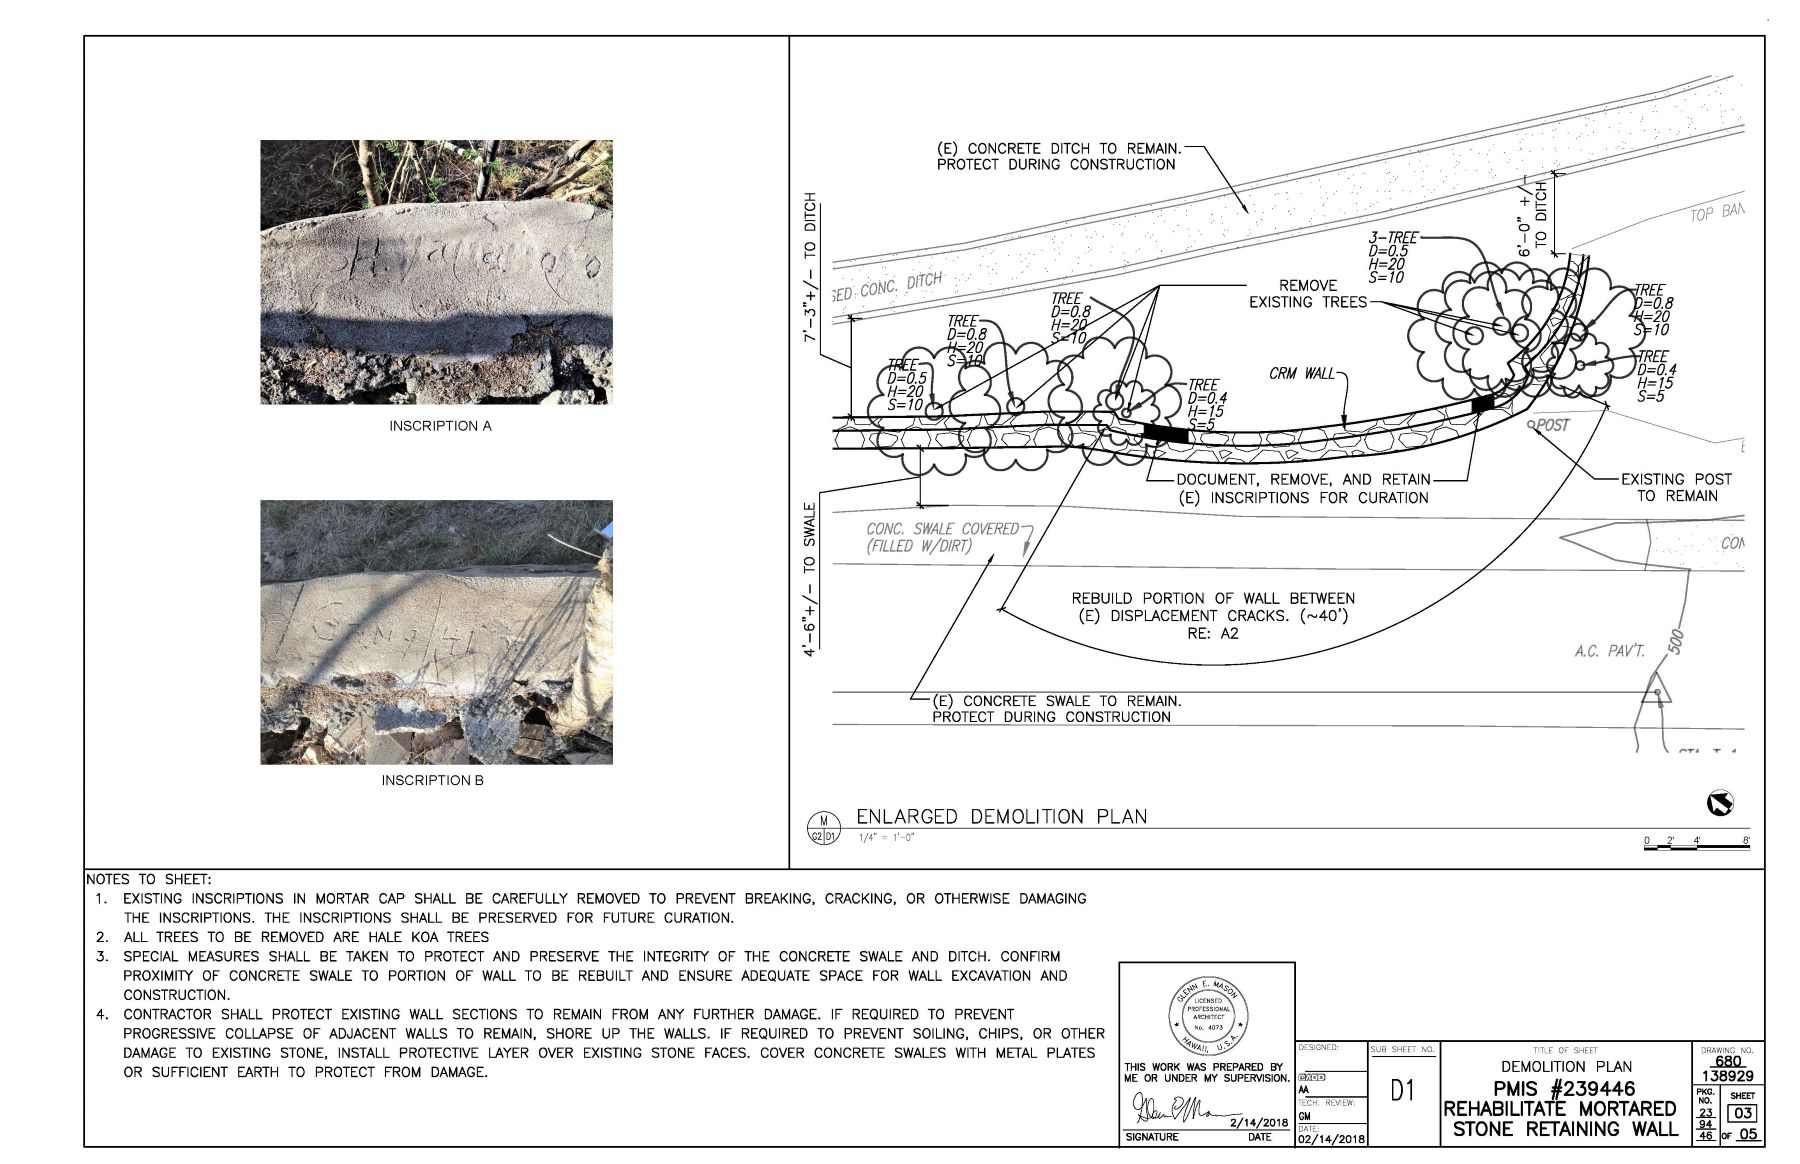
- Image 5, Enlarged Demolition Plan: “Existing inscriptions in mortar cap shall be carefully removed to prevent breaking, cracking, or otherwise damaging the inscriptions. The inscriptions shall be preserved for future curation…”
This documentation assures that the reconstructed stone wall will match the original. Right click on an image to open it in a new tab and see it enlarged. Documentation courtesy of MASON.
Hale Koa Barracks
A notable case where documentation did not occur prior to disassembly is the historic ‘Iolani Barracks relocated to the site of ‘Iolani Palace during the construction of the Hawai‘i State Capital. The stone structure was dismantled without documenting the original orientation and location of each masonry unit. As a result, the reconstructed structure closely resembles the original, but was reconstructed in reverse order with the bottom stones on top.
Source: interview with Glenn Mason who worked with architects Geoffrey Fairfax and Ty Sutton on the restoration of ‘Iolani Palace.
Image 1, Site Map
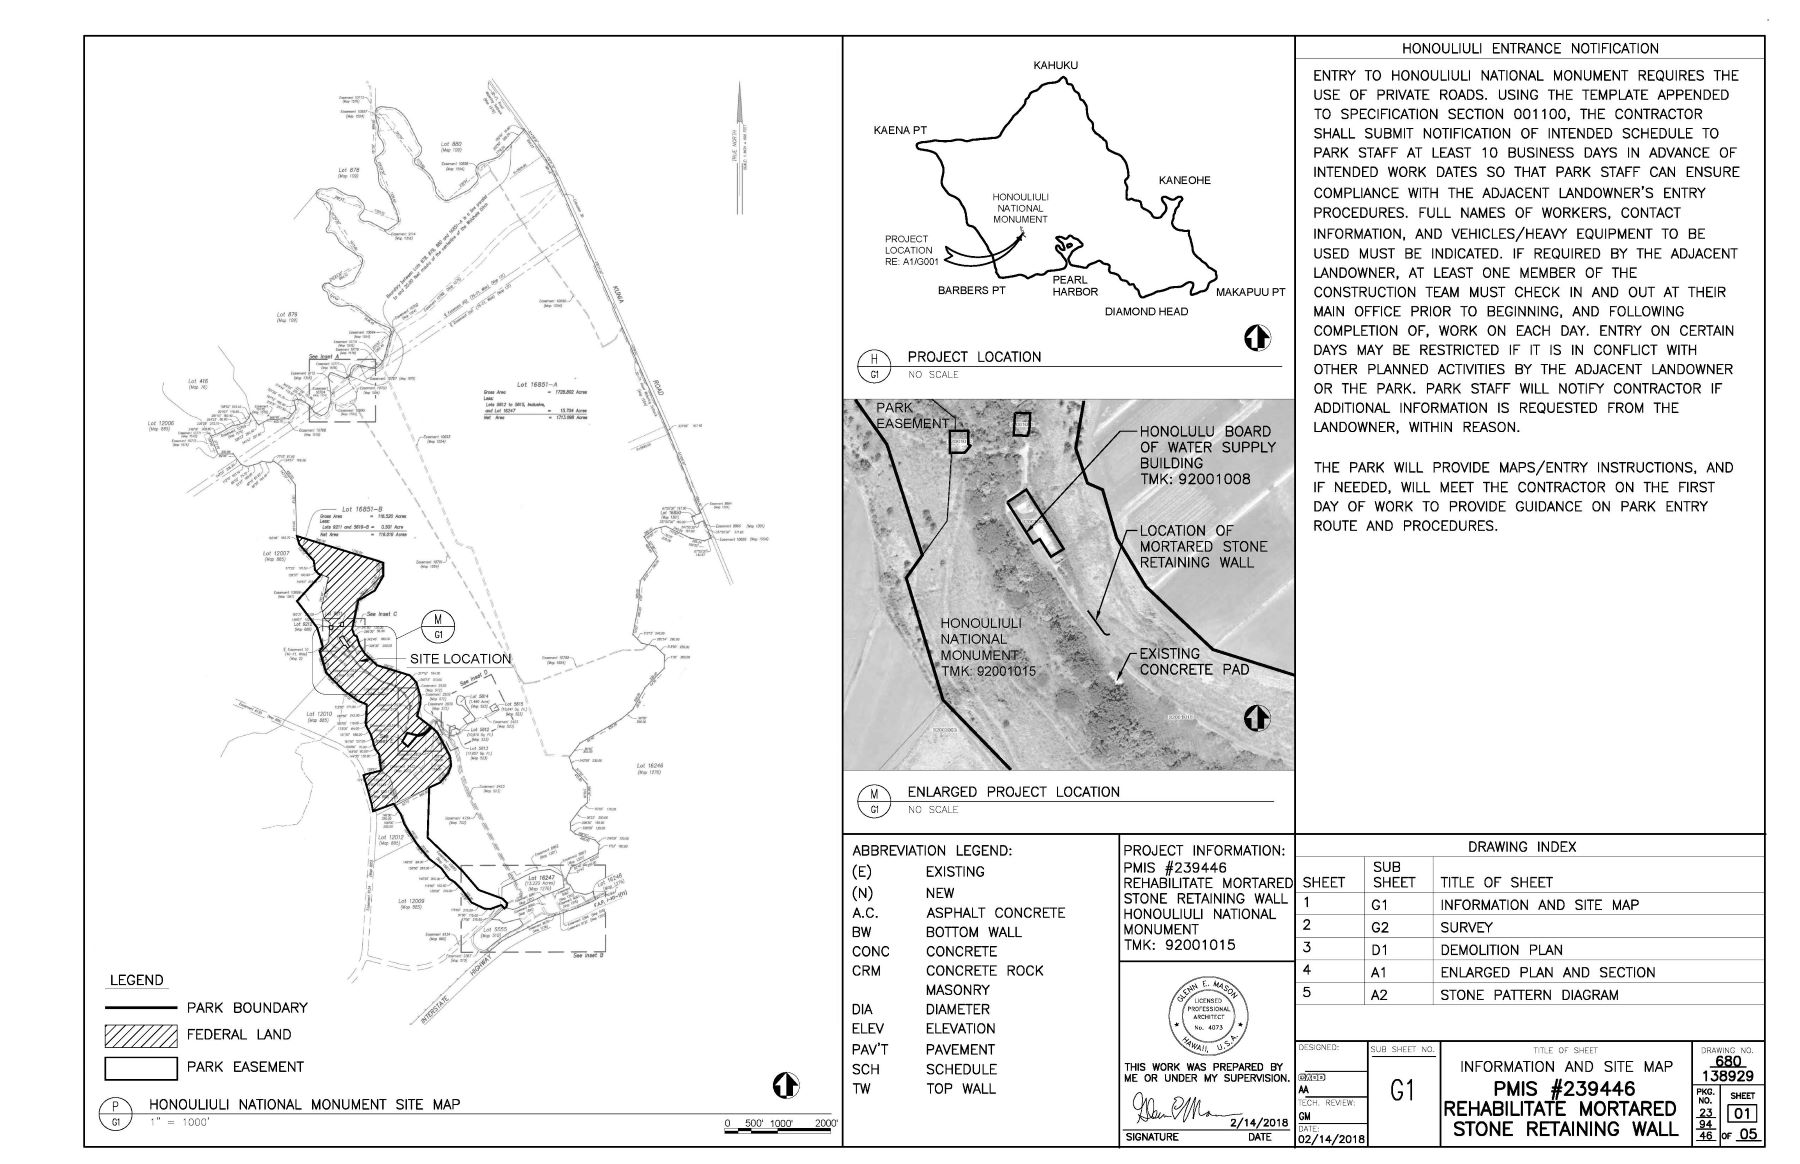
Image 2, Topographical Survey
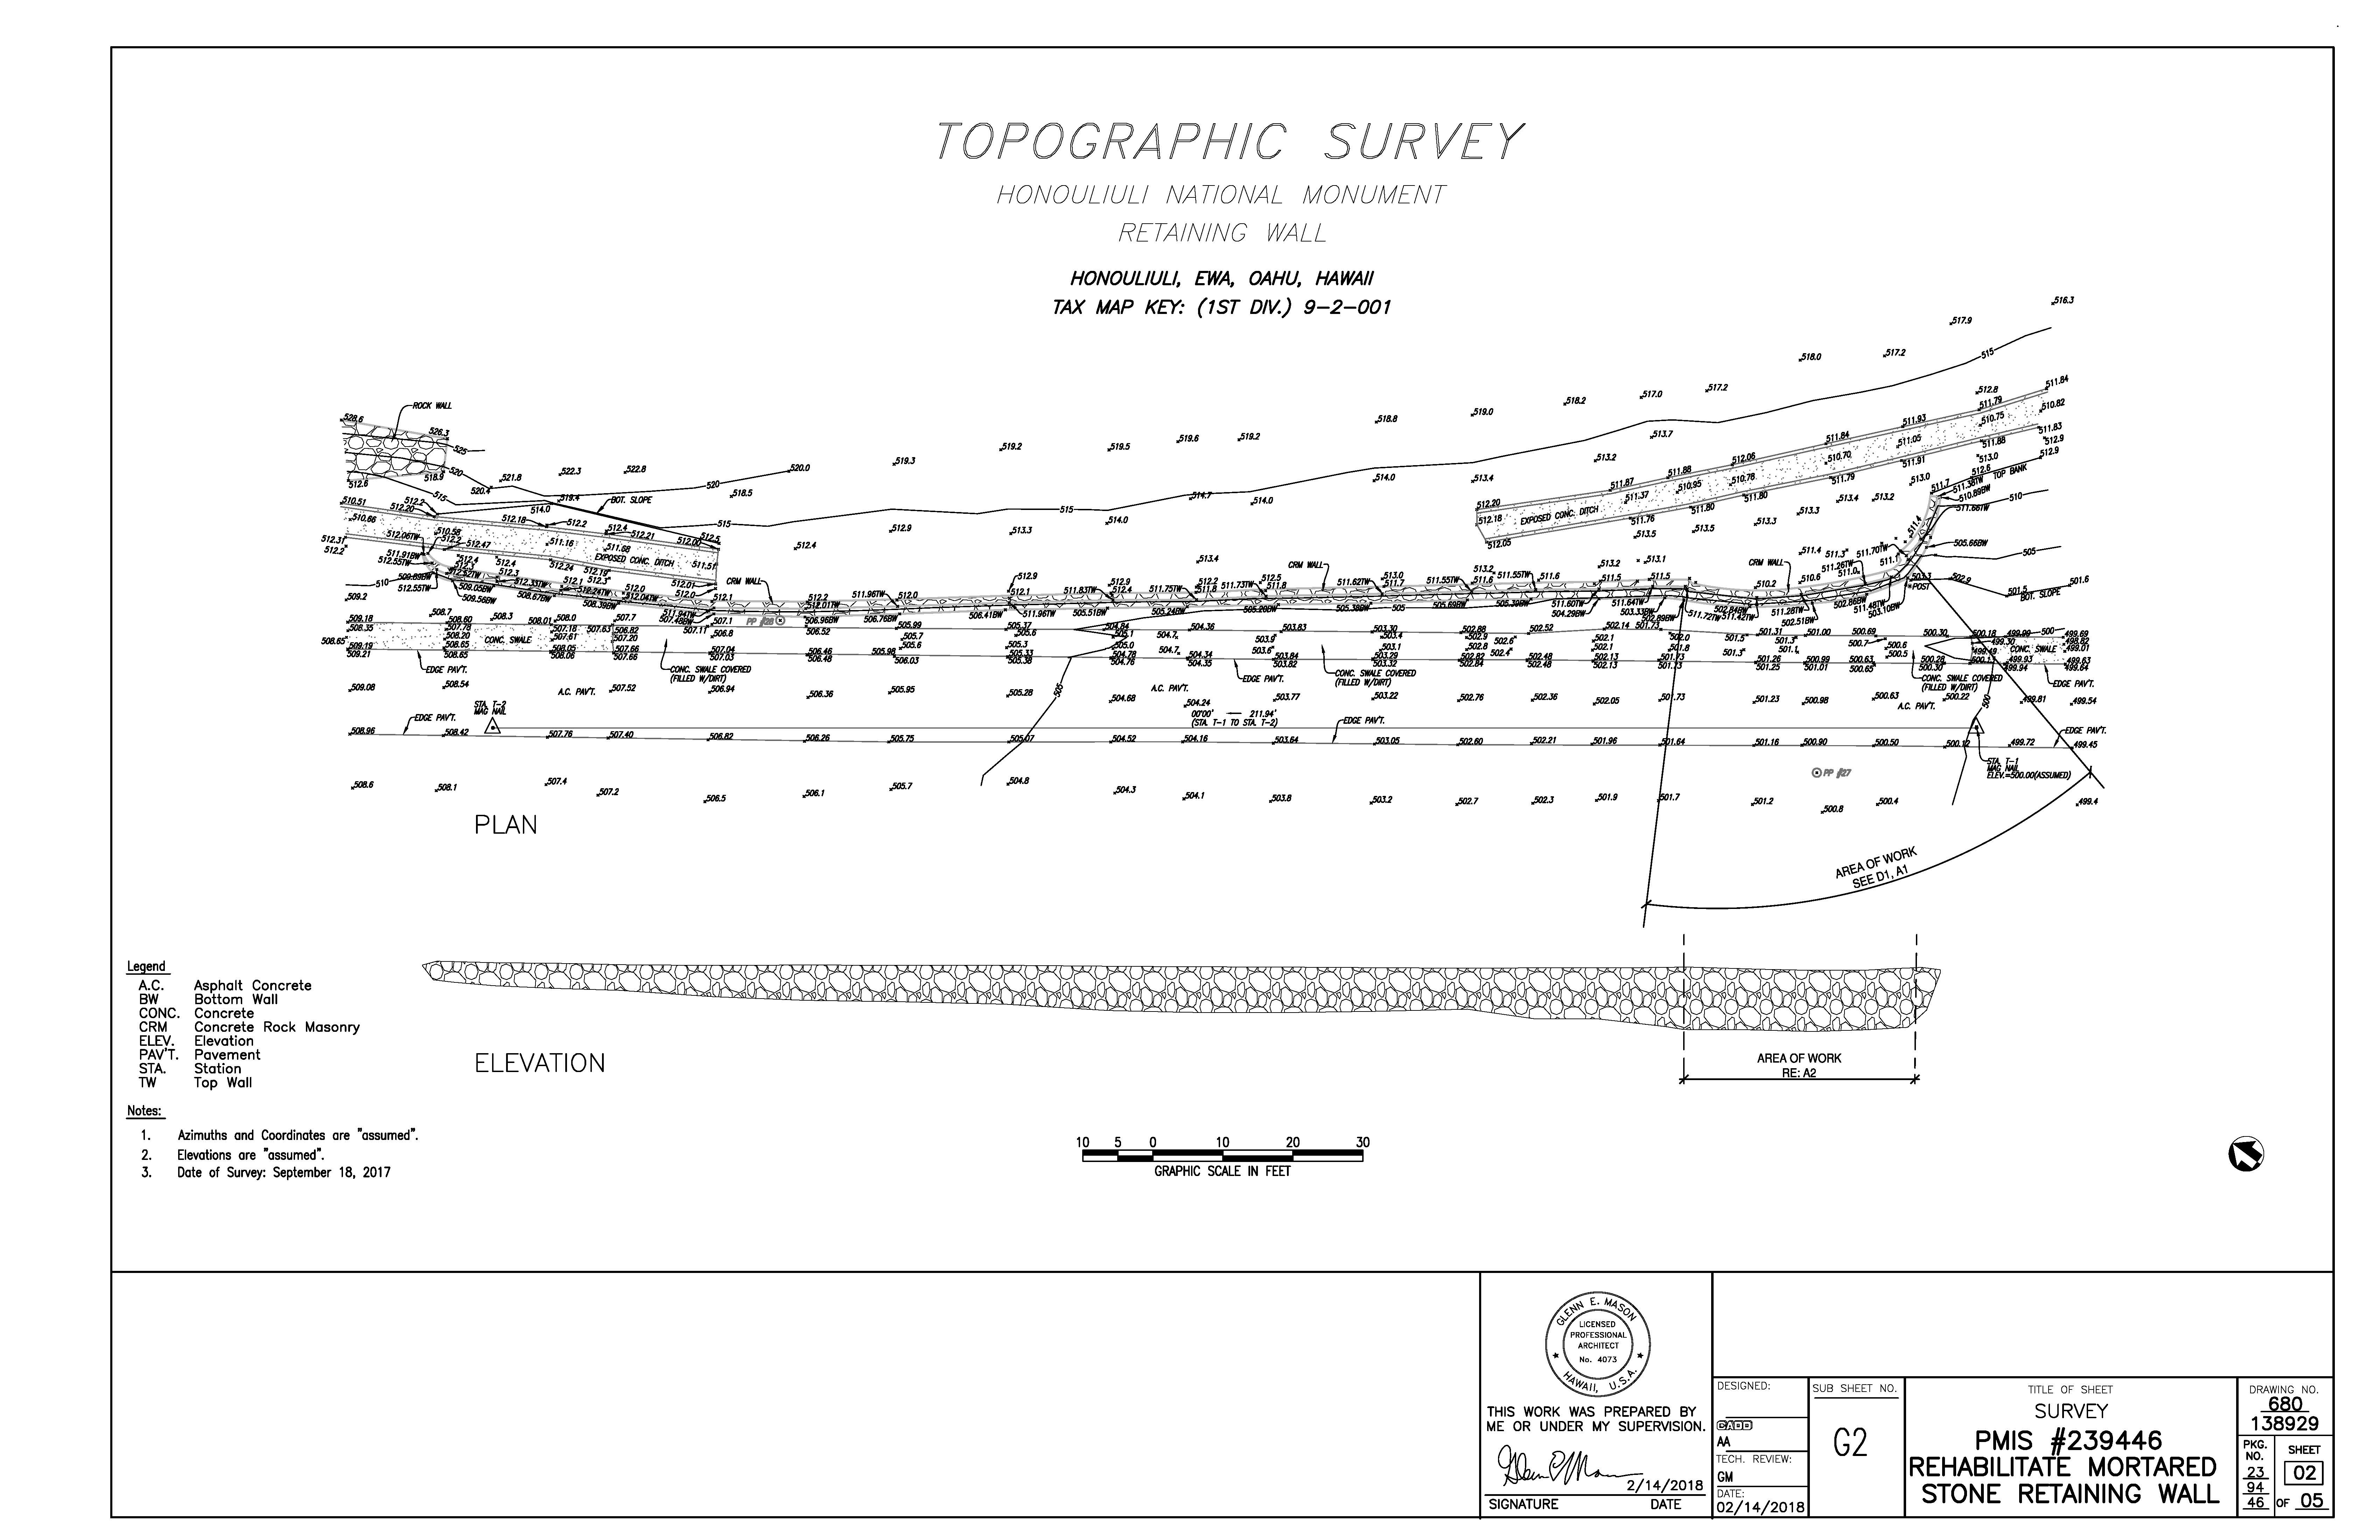
Image 3, Numbered Stone Diagram
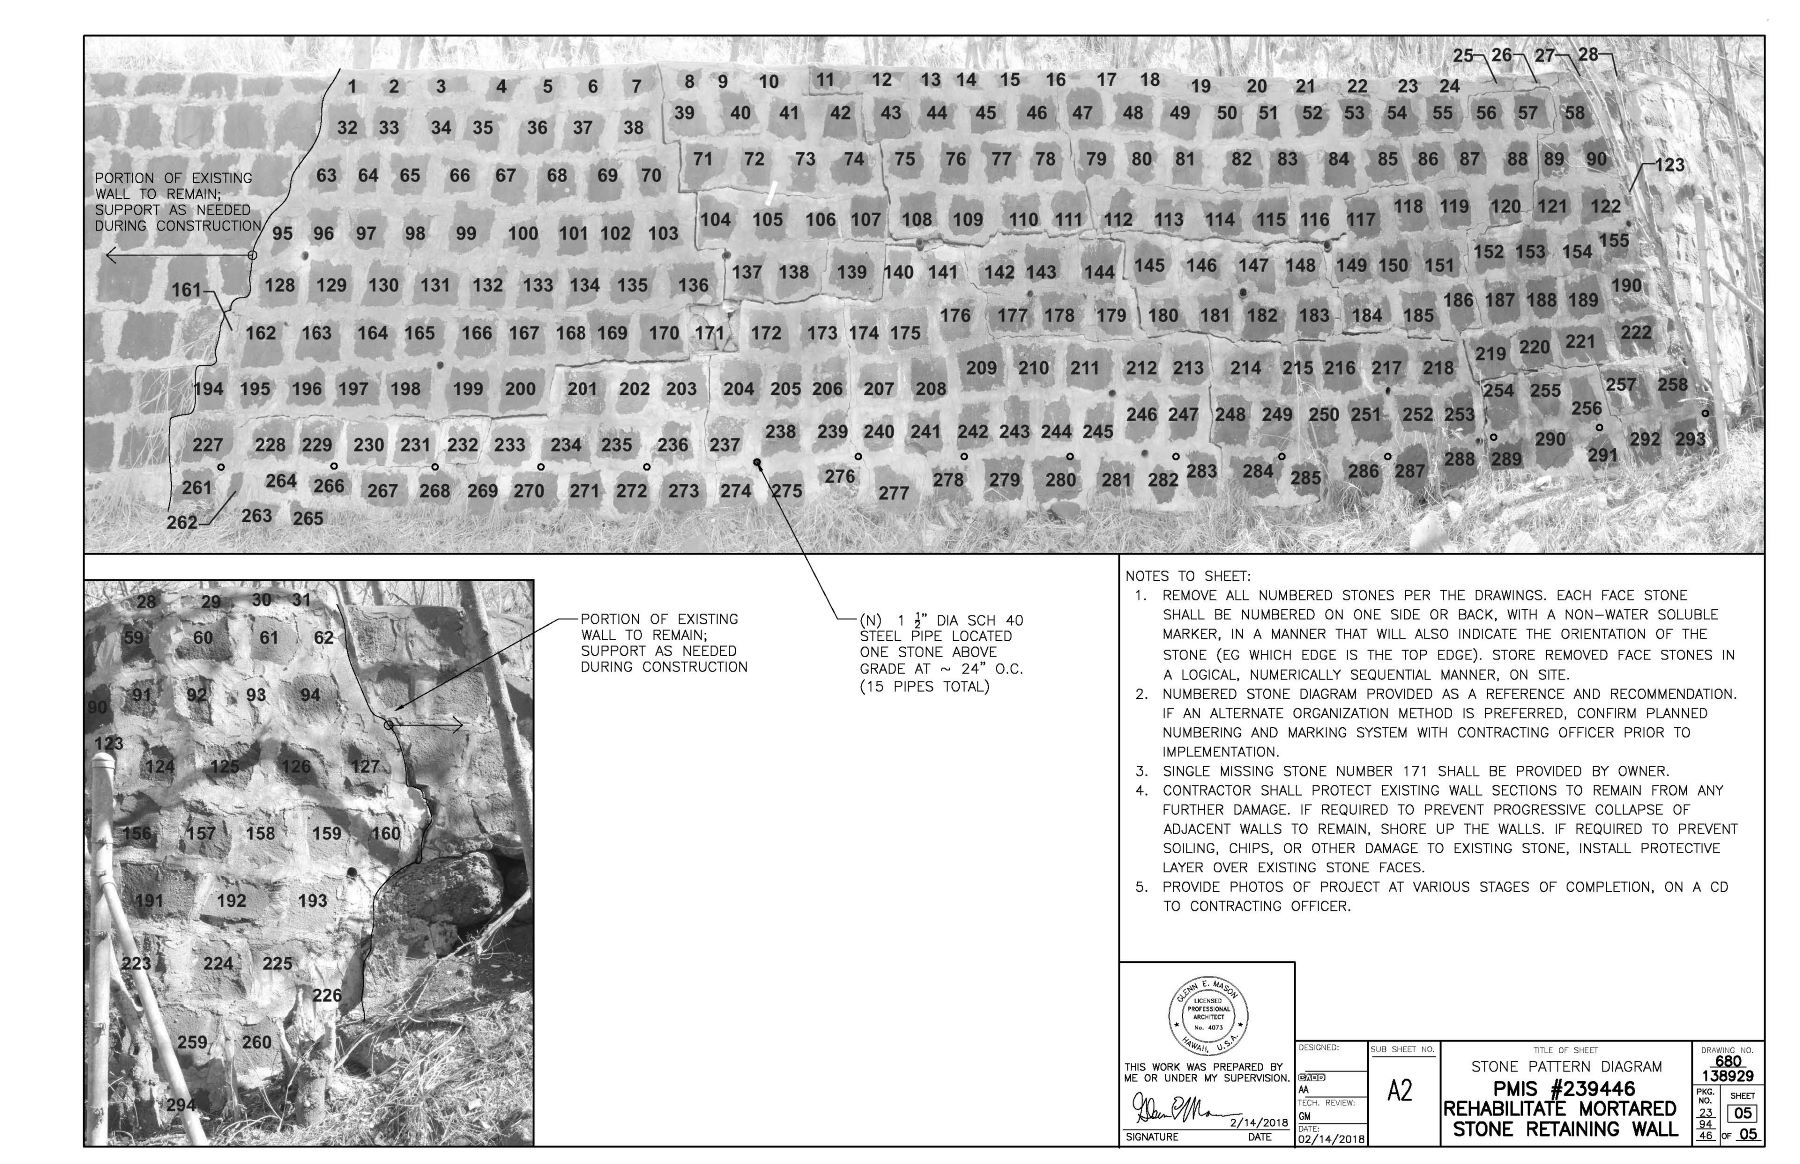
Image 4, Retaining wall section
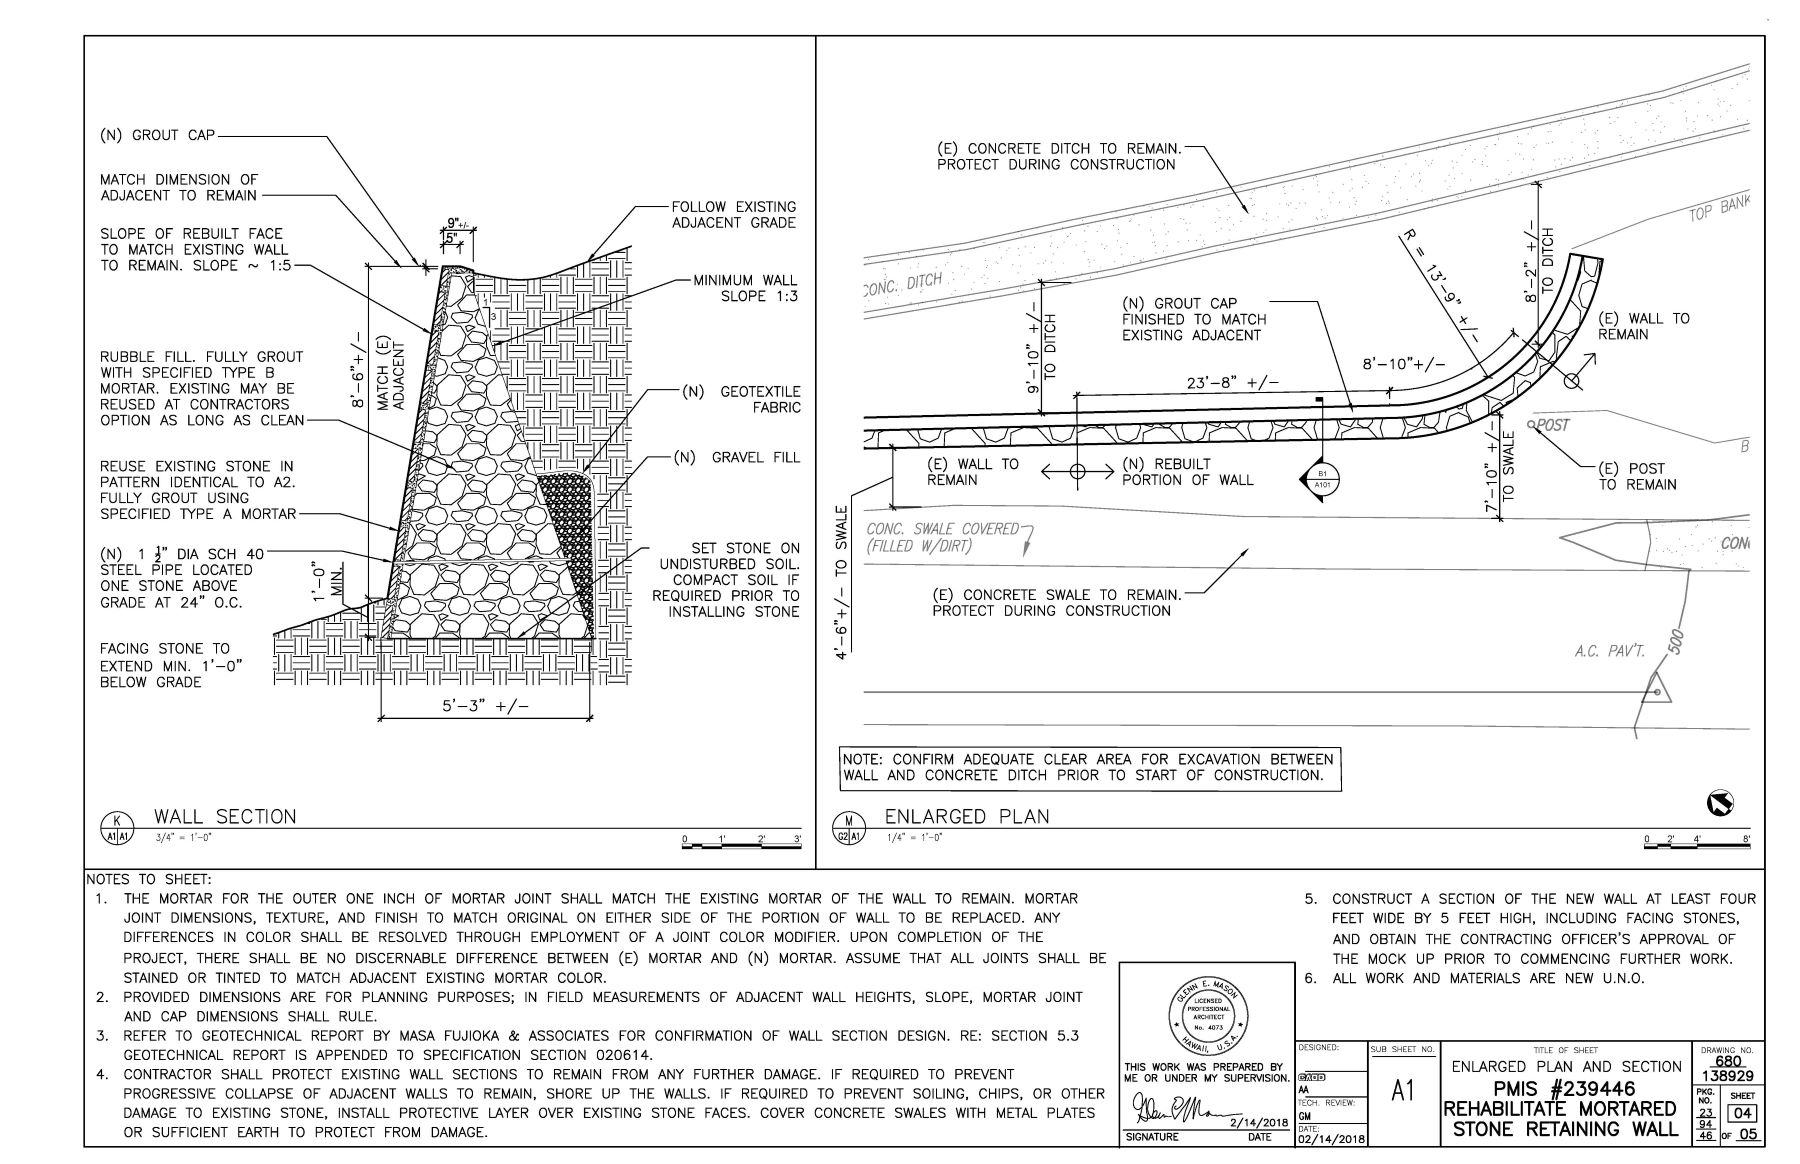
Image 5, Enlarged Demolition Plan
II. Restoration of a Historic Stained-Glass Window: Moanalua Community Church
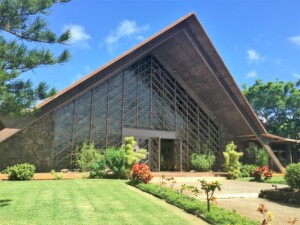 Moanalua Community Church began as a chapel for sailors in World War II. The existing A-frame structure was designed by architect Clifford F. Young as a permanent replacement for the original Quonset hut chapel. Entering from the front side, the stained-glass window covers the entire front A-frame wall.
Significance: The window was designed in 1958 by John Wallis of the Wallis-Wiley Studio from Pasadena California. The design wove the ideas of the 1950s congregation into his creation. Elements include a map of Pearl Harbor, and aircraft and ships depicting battles from the Revolutionary War to World War II. Military insignia are there, along with Jewish, Muslim, Buddhist, Hindu and Confucian symbols, a vision of diversity ahead of its time. The Pearl Harbor Memorial Window is acknowledged by the Society of Architectural Historians as one of the two largest single-window installations in the United States.
Project Purpose: To repair, refinish and secure the stained-glass façade consisting of 140 stained glass sections, each section containing from twelve to twenty individual pieces, with an overall size of 44 feet wide by thirty feet tall.
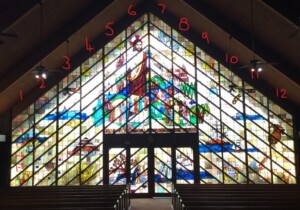 Documentation: A grid was overlaid on the photo dividing the glass sections into twelve vertical sections containing numbered horizontal (diagonal) rows, mapping each of the 140 glass panels (see markings on adjacent photo).
Rehabilitation: Seventy panels have been identified as needing to be disassembled, shipped and rebuilt at a specialty glass restoration workshop location in Colorado. Clear glass will be installed temporarily in place of the removed panels. The rebuilt panels to be returned to Honolulu and reinstalled. The remaining seventy panels shall be cleaned and lightly repaired in place.
Following the documentation and rehabilitation steps outlined above, both historic structures retain the integrity that qualifies the historic property for inclusion on the National Register of Historic Places.
Images courtesy of the Moanalua Community Church.
III. Rehabilitation of Historic Wood Double-Hung Windows at the Parish Hall of ‘Ewa Community Church
In the summer of 2021, Historic Hawai‘i Foundation sponsored a Wooden Window Workshop to introduce and train carpentry students in the Hawai‘i Community College program to the techniques involved in the rehabilitation of historic wooden windows. The hands-on preservation trades training involved the repair and rehabilitation of windows at the parish hall of ‘Ewa Community Church. Project partners included Alan Shintani, Inc.; the Association of Preservation Technology, Hawai‘i-Pacific Chapter; the Building Industry Association of Hawai‘i; Hawai‘i Carpenters Apprenticeship & Training Fund, and Honolulu Community College, Transportation & Trades Division.
The workshop repaired sixteen double-hung wooden windows in need of repair at a historic site, providing hands-on training with experts in historic wooden window repair. Participants broadened their skills in this specialty field of carpentry, were introduced to historic preservation principles, and learned best practices for assessing, repairing and maintaining historic wooden windows. (For further info: Wooden Window Workshop Recap and Photos)
Historic windows typically custom-fit the original opening in which they are installed. Over time, a window and its frame may settle a bit, further reinforcing the custom shape and dimensions of the window. To remove for repair, documentation must be done to note the original location, location of each sash within the framed opening, and then a condition analysis of each component part of the sash.
The workshop included documentation steps as part of the rehabilitation process:
- Mark architectural elevations with each individual window number (Drawing A)
- Mark the frame and sash (sliding) portion of each window at the opening (Photo 3018)
- Remove sash to a shop facility and evaluate condition of each component
- Repair wood components, re-glaze and putty, paint and return to Parish Hall for installation
- Reinstall repaired sash in documented window opening, adjusting sash weights and hardware
- Repaint reassembled frame on site (“after” photo of same window)
Additional reference: Ask an Expert: What is the best way to repair or replace historic wooden windows?
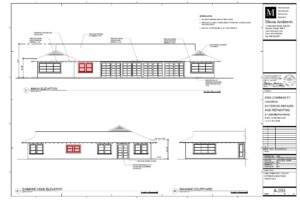
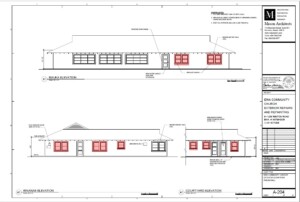
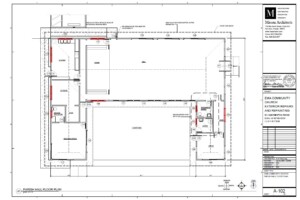
Images above: ‘Ewa Community Church Exterior Repairs and Repainting Plan courtesy of MASON.
An edited version of this article appeared in the March 2022 Historic Hawaiʻi News, HHF’s newsletter published three times a year. Become a member of HHF to start your subscription!


